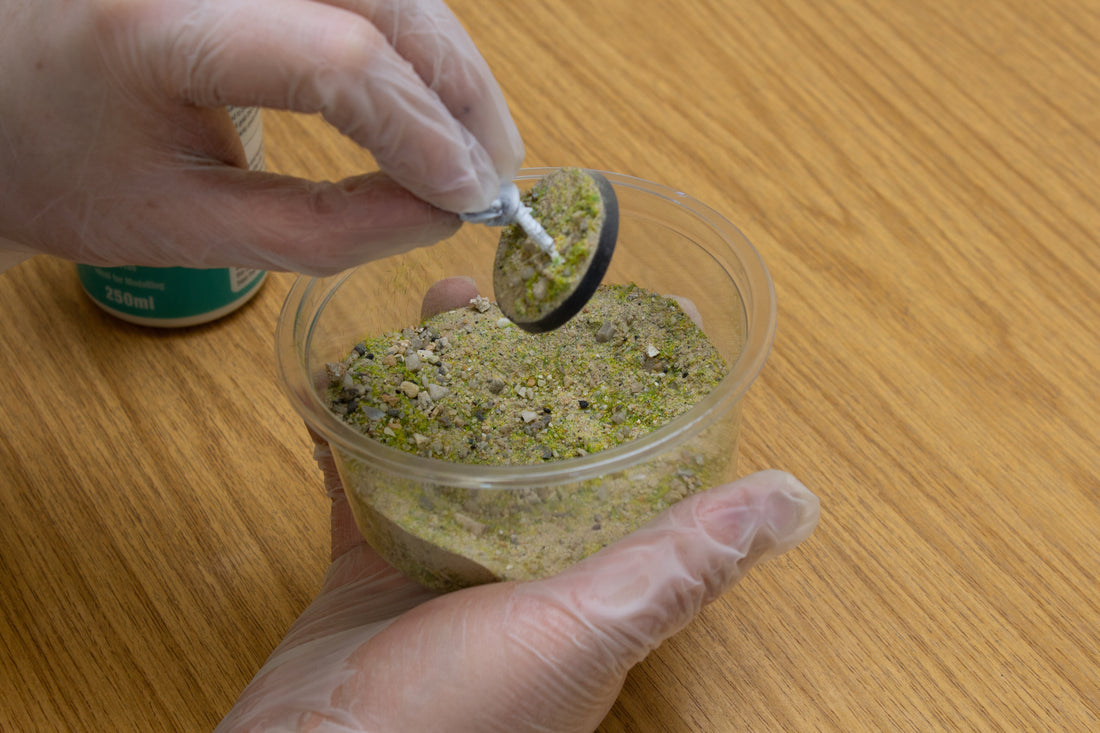
This guide will teach you how to use Base Ready products from Geek Gaming Scenics (GGS) to create realistic and textured bases for your miniature figurines. A well-designed base can add a lot of character and context to your miniatures, making them stand out on the tabletop battlefield.
Materials:
- Base Ready (of your choice): Base Ready comes in a variety of pre-mixed terrain textures, such as desert sands, grassy fields, or even city rubble. Choose the texture that best suits the environment you envision for your miniature.
- GGS Basing Glue: While you can use other glues, We recommend our Basing Glue for optimal adhesion and drying time with Base Ready products.
- An old paintbrush: This will be used to spread the glue on the miniature base.
- Optional: Container for Base Ready: While Base Ready comes in a bag, transferring it to a container with a wider opening can make scooping and applying the material easier, especially for the dipping method.
Creating the Base:
-
Apply Basing Glue: Add a thin but even layer of glue to the base of your miniature. If your chosen Base Ready contains larger stones, ensure the glue application is thick enough to hold them securely. A skimpy glue layer might cause them to fall off later.

-
Spread the Glue: Use the old paintbrush to spread the glue evenly across the base. Avoid spreading it too thin, especially in areas with larger stones.
As too thin a coat and the larger stones will drop off the base once dry.
-
Apply Base Ready (Dipping Method): Tip: For this method, transferring the Base Ready to a container is recommended for easier scooping. Dip the entire miniature base into the Base Ready mix, ensuring it's completely covered.

- Apply Base Ready (Scatter Method): For this method, transferring the Base Ready to a container is not necessary. Just take a small handful of Base ready mix and sprinkle it over the entire miniature base, ensuring it's completely covered.

-
Remove Excess Material: Gently tap or shake off any excess Base Ready from the miniature. Be careful not to overdo this, as you might dislodge stones or other decorative elements.

Drying and Finishing:
- Drying Time: Allow the base to dry completely. GGS recommends leaving it overnight for the best results, especially if there are deep pools of glue. But thin coats should dry fast.
- Removing Excess: Once dry, gently shake or blow off any loose Base Ready material from the base.
- Adding Details (Optional): After drying, you can further enhance your base by adding static grass tufts, miniature plants, rocks, or other decorative features to create a more realistic scene.
- Cleaning Up: Use a brush or cloth to wipe away any dust or Base Ready residue from the sides of the base for a clean finish.
Additional Tips:
- Decanting for Convenience: Transferring the Base Ready from the bag to a container with a wider opening can significantly improve ease of use, especially for the dipping method.
- Glue Thickness Matters: A thin layer of glue might not hold larger stones or decorative elements securely. Ensure you apply enough glue to provide a good bond.
By following these steps and tips, you can create stunning and realistic textured bases for your miniatures using Base Ready. Experiment with different Base Ready textures and decorative features to create unique and personalized miniature figures!
